Adtraction Tracking Implementation for Google Tag Manager
deltaoptical.pl -- Closed 2024-10-01 - CPS
To track the number of orders / conversions referred by your partners, you need to set up Adtraction tracking on your website. This requires creating a special subdomain under your main domain and linking it to the Adtraction tracking server. When someone clicks on an Adtraction link, they will first pass through this subdomain before being redirected to the appropriate page on your website.
This subdomain is crucial for Adtraction's tracking system because it helps reduce the dependence on third-party cookies. By setting first-party cookies on your domain, it lowers the chance of transactions being missed due to cookie blocking.
For any questions about the implementation, feel free to contact our support team.
1. Create a subdomain
Create a subdomain named pin on the domain where your store is hosted. This means that the address to your subdomain should be pin.[your_domain], so for example pin.website.com.
Point the subdomain to the Adtraction tracking server by adding a CNAME record with the value cloud.adt790.com. We recommend setting the TTL (Time to Live) to 60 seconds.
You only need one subdomain for each partner program, no matter how many event codes you plan to add.
Once the subdomain is active, inform your contact at Adtraction so we can configure our tracking server to work with your subdomain. As part of this setup, Adtraction will provide an SSL certificate for your subdomain.
2. Add the Adtraction tag
Navigate to the Tags section in your GTM account and click "New". Select "Custom HTML tag".
Copy and paste the code below into your GTM tag.
Configure your tag to fire on All DOM Ready Events, ie on every page on your website (including the purchase confirmation page).
<script defer src="https://pin.[your_domain]/jsTag?ap=1833983249"></script>
[your_domain] must be replaced with the actual domain where your store is hosted, so that the JavaScript is loaded from the subdomain created in Step 1. Important!
3. Add the data layer
The data layer is a JavaScript array that sends transaction details from your purchase confirmation page to your GTM container.
To set this up, add the following code snippet to your website's purchase confirmation page. Make sure to place the data layer code above the GTM container code.
The values shown in the example below are just placeholders. When a transaction is completed and the confirmation page loads, the data layer should include the actual transaction details.
<script>
  dataLayer = [{
    'transactionId': 'abc123',
    'transactionTotal': 2900.00,
    'transactionPromoCode': 'Discount55',
    'md5': 'b58996c504c5638798eb6b511e6f49af'
  }];
</script>
transactionId should contain a unique order reference. If the same order reference is used more than once, it will be considered a duplicate and won't be tracked.
transactionTotal should contain the total transaction amount,
excluding both VAT and delivery costs, after any discounts have been applied.
The value must be a decimal number, without any thousand separators and using a standard dot character as the decimal point, for example 1083.29.
transactionPromoCode should contain the coupon code or voucher code used in the transaction. If no coupon or voucher was used, leave empty.
md5 should contain an MD5 hash of the user's email address. Make sure the email address is trimmed, converted to lowercase, and encoded in UTF-8 before hashing. This hash is used for cross-device tracking. For help with hashing, please refer to our hashing functions.
4. Declare the variables
Variables are used to send information from the data layer to GTM. You need to declare one variable for each value in the data layer. Navigate to the Variables section in your GTM account and click "New" under "User-Defined Variables". Select "Data Layer Variable" as variable type.
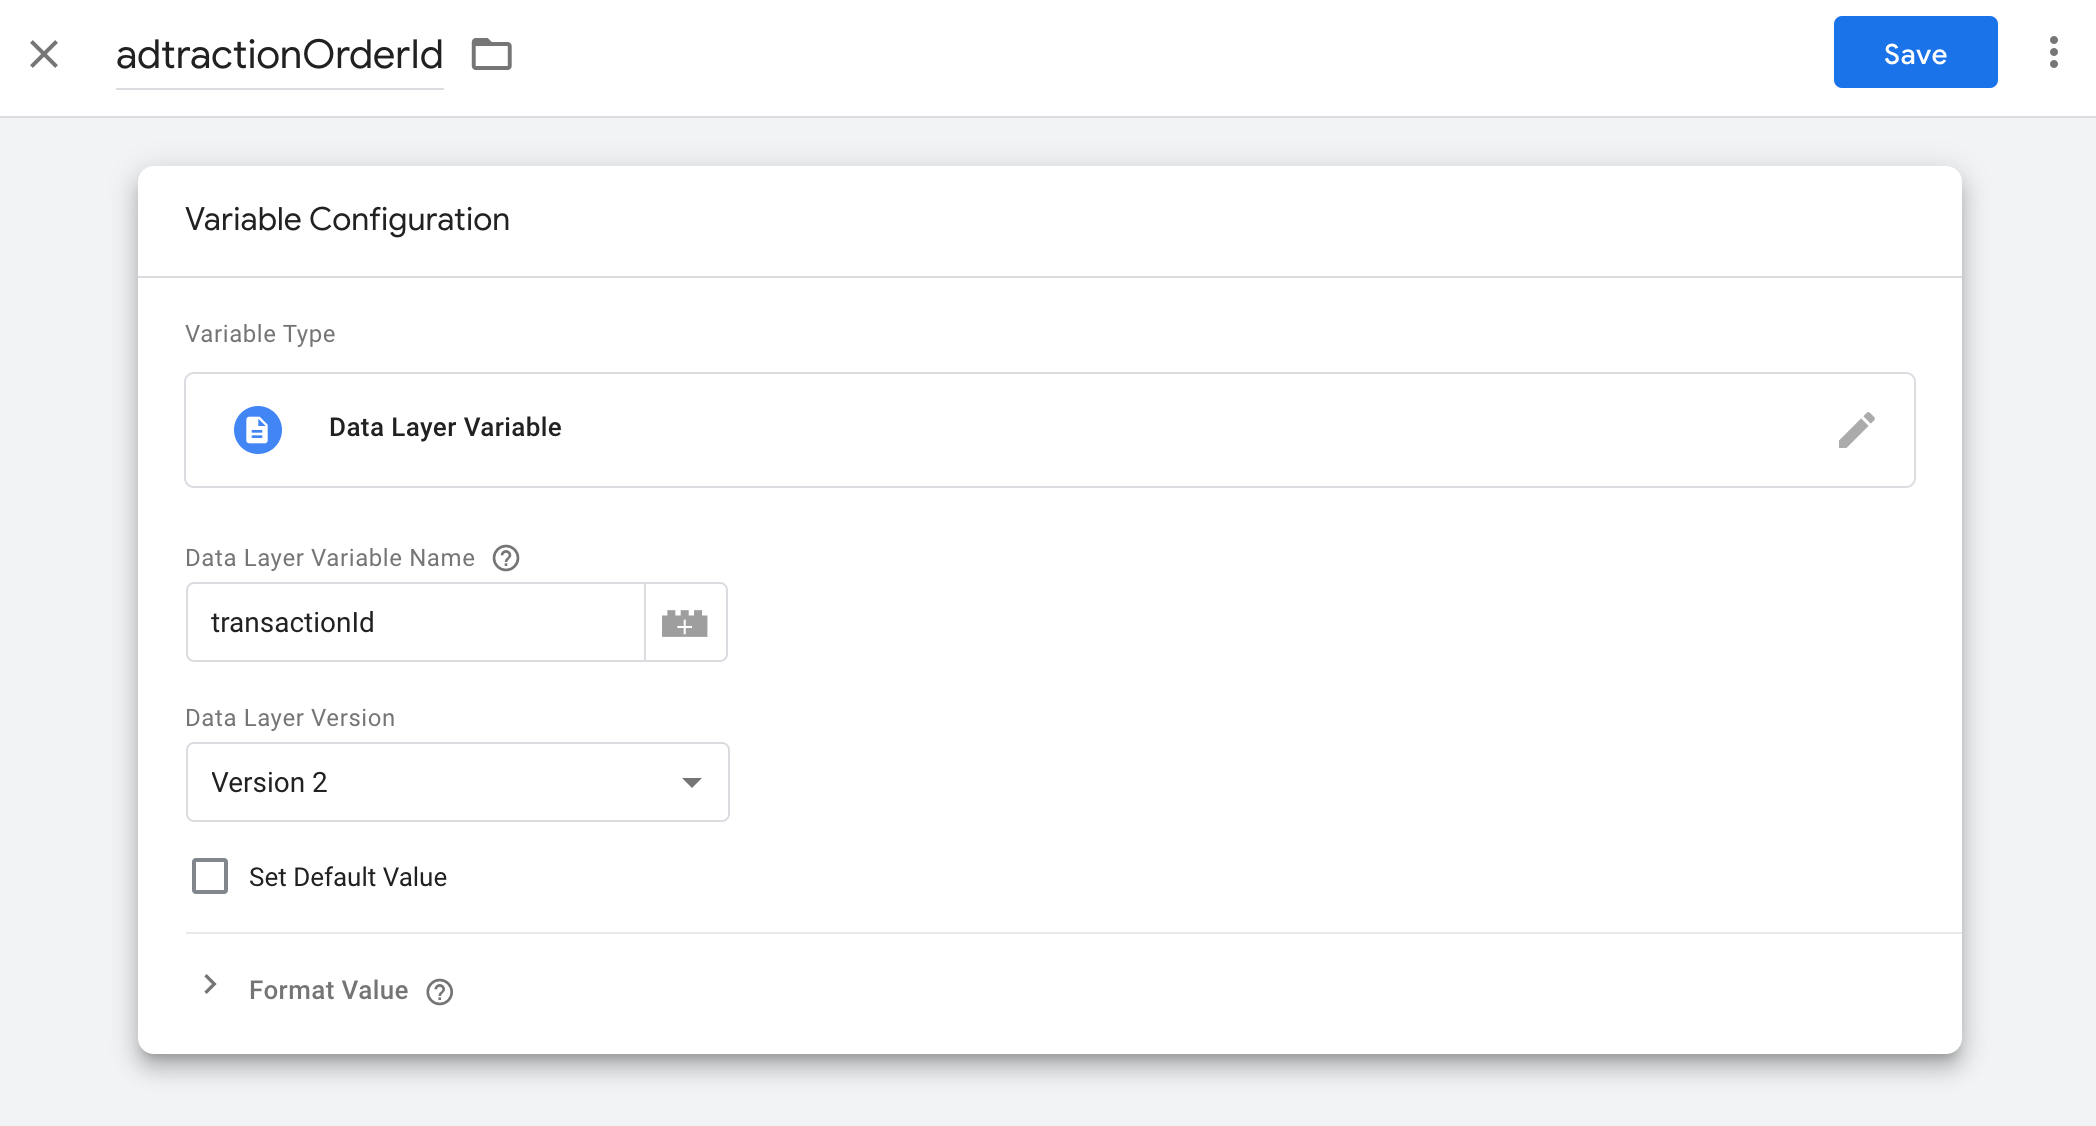
In the example above we have declared a new data layer variable named adtractionOrderId which maps to the transactionId variable in the data layer. The same should be done for each variable in the data layer, as summarized in the table below.
| Data layer variable name | GTM variable name | Data layer version | Variable type |
|---|---|---|---|
| transactionId | adtractionOrderId | Version 2 | Data layer variable |
| transactionTotal | adtractionTotal | Version 2 | Data layer variable |
| transactionPromoCode | adtractionCoupon | Version 2 | Data layer variable |
| md5 | adtractionMd5 | Version 2 | Data layer variable |
5. Create a trigger for the event code
A trigger defines when GTM fires the event code, which should be whenever the purchase confirmation page on your website is loaded. Navigate to the Triggers section in your GTM account and click "New".
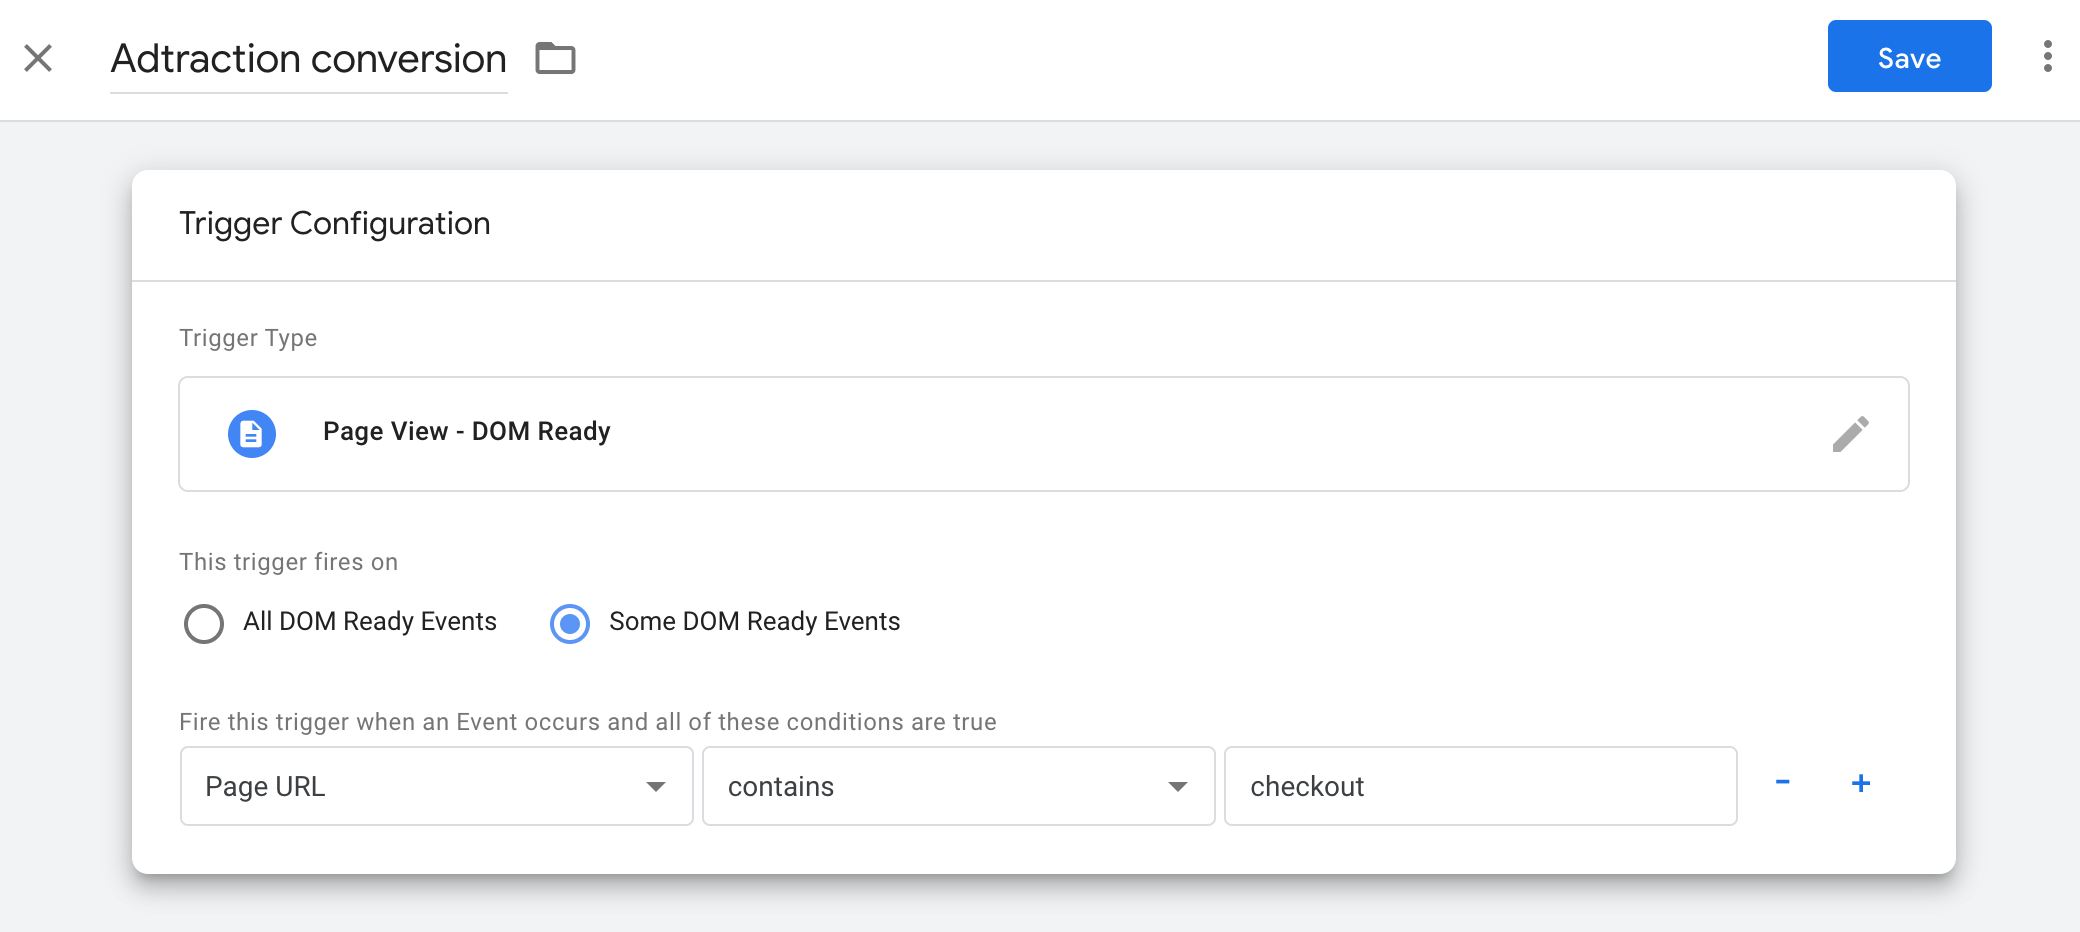
Select DOM Ready as Event type, and instruct the trigger to fire on Some DOM Ready Events.
Configure the trigger to fire only when the confirmation page on your website is loaded by adding a suitable condition. In this example we require the Page URL to contain "checkout".
Important: Make sure that the Adtraction tag is set to trigger after the Event code on the purchase confirmation page. Open the Event code tag and navigate to the Advanced Settings section. Within Advanced Settings, locate the Tag Sequencing options and check the box labeled Fire a tag after [...] and set the Adtraction tag as the Cleanup tag.
6. Add the event code
In this step we use the variables declared in the previous step to create a custom HTML tag. Navigate to the Tags section in your GTM account and click "New". Select "Custom HTML tag". Copy and paste the event code below into your GTM tag.
Your event code
<script>
  var ADT = ADT || {};
  ADT.Tag = ADT.Tag || {};
  ADT.Tag.t = 3;
  ADT.Tag.c = "PLN";
  ADT.Tag.tp = 1833983350;
  ADT.Tag.am = {{adtractionTotal}};
  ADT.Tag.ti = "{{adtractionOrderId}}";
  ADT.Tag.xd = "{{adtractionMd5}}";
  ADT.Tag.cpn = "{{adtractionCoupon}}";
</script>
Configure your tag to use the trigger created in step 5.
7. Publish the tags
Click the Publish button in the top right corner of your GTM account to publish your tags to your website. Adtraction conversion tracking should now be active on your website.
Implementation checklist
- transactionTotal should be provided excluding both VAT and delivery costs, after any discounts have been applied.
- transactionTotal must be provided in the correct currency (PLN).
- transactionId must be unique for each transaction.
- md5 email addresses must be trimmed, converted to lowercase, and encoded in UTF-8 before hashing.
- The event code needs to run every time the confirmation page is loaded.
- The event code should automatically run once a transaction is completed, without requiring the user to click "return to merchant" or any similar button from an external payment provider.
- Tracking must be implemented on both the desktop and mobile versions of the site.
- A test purchase should be conducted in the production environment to verify the implementation. Please contact your Adtraction account manager for assistance.